学习了一些基础控件之后来用代码写一个登录界面吧,
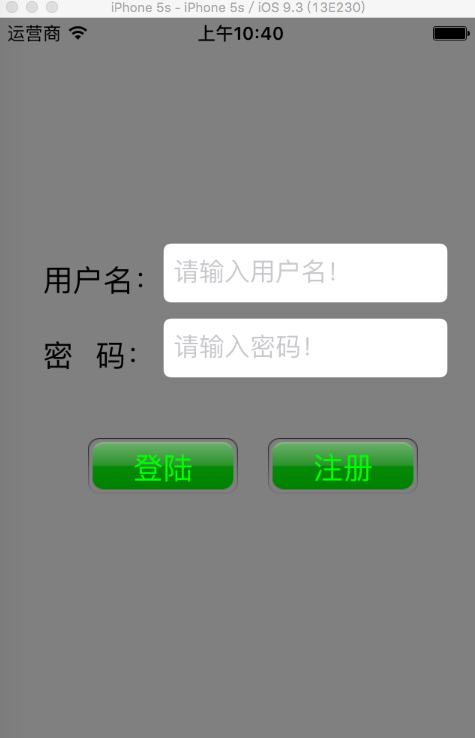
这是登录的页面:
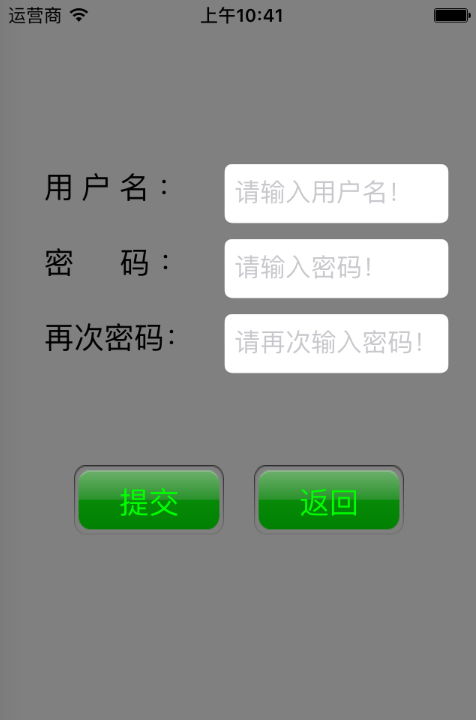
下面看一下注册的页面:
是不是看见界面很有感觉????,来看代码~
首先我们先把这些要用到的部分控件声明成全局变量:
@interface ViewController (){
    UITextField *tf3;
    UITextField *tf2;
    UITextField *tf1;
    UIView *view1;
    UIView *view;
}
@end
然后就是我们的登录页面:
- (void)signIn{
    view = [[UIView alloc] init];
    view.frame = CGRectMake(0, 0, 320, 480);
    view.backgroundColor = [UIColor grayColor];
    [self.view addSubview:view];


    //背景
    UIImageView *imageView = [[UIImageView alloc] initWithFrame:CGRectMake(0, 0, 320, 480)];
    imageView.image = [UIImage imageNamed:@"1.jpg"];
    imageView.userInteractionEnabled = YES;
    [view addSubview:imageView];


    //标签
    UILabel *label1 = [[UILabel alloc] init];
    label1.frame = CGRectMake(30, 150, 80, 50);
    label1.text = @"用户名:";
    label1.font = [UIFont systemFontOfSize:20];
    [imageView addSubview:label1];


    UILabel *label2 = [[UILabel alloc] init];
    label2.frame = CGRectMake(30, 200, 80, 50);
    label2.text = @"密   码:";
    label2.font = [UIFont systemFontOfSize:20];
    [imageView addSubview:label2];

    //输入框

    UITextField *tf4 = [[UITextField alloc] init];
    tf4.frame = CGRectMake(110, 150, 190, 40);
    tf4.placeholder = @"请输入用户名!";
    tf4.borderStyle = UITextBorderStyleRoundedRect;
    tf4.clearButtonMode = UITextFieldViewModeUnlessEditing;
    //    tf4.keyboardType = UIKeyboardTypeNumberPad;
    [imageView addSubview:tf4];

    UITextField *tf5 = [[UITextField alloc] init];
    tf5.frame = CGRectMake(110, 200, 190, 40);
    tf5.placeholder = @"请输入密码!";
    tf5.secureTextEntry = YES;
    tf5.borderStyle = UITextBorderStyleRoundedRect;
    tf5.clearButtonMode = UITextFieldViewModeUnlessEditing;
    //    tf5.keyboardType = UIKeyboardTypeNumberPad;
    [imageView addSubview:tf5];

    //按钮
    UIButton *btn1 = [[UIButton alloc] init];
    btn1.frame = CGRectMake(60, 280, 100, 40);
    //    btn1.backgroundColor = [UIColor greenColor];
    [btn1 setTitle:@"登陆" forState:UIControlStateNormal];
    [btn1 setTitleColor:[UIColor greenColor] forState:UIControlStateNormal];
    btn1.tag = 100;
    btn1.titleLabel.font = [UIFont systemFontOfSize:20];
    [btn1 addTarget:self action:@selector(btnClick:) forControlEvents:UIControlEventTouchUpInside];
    //    设置背景图片
    UIImage *image = [UIImage imageNamed:@"3"];
    [btn1 setBackgroundImage:image forState:UIControlStateNormal];
    [imageView addSubview:btn1];


    UIButton *btn2 = [[UIButton alloc] init];
    btn2.frame = CGRectMake(180, 280, 100, 40);
    //    btn2.backgroundColor = [UIColor greenColor];
    [btn2 setTitle:@"注册" forState:UIControlStateNormal];
    [btn2 setTitleColor:[UIColor greenColor] forState:UIControlStateNormal];
    btn2.tag = 200;
    btn2.titleLabel.font = [UIFont systemFontOfSize:20];
    [btn2 addTarget:self action:@selector(btnClick:) forControlEvents:UIControlEventTouchUpInside];
    //    设置背景图片
    [btn2 setBackgroundImage:image forState:UIControlStateNormal];
    [imageView addSubview:btn2];
}
这里我们做了一个判断,如代码所示,下面实现以下按钮绑定的方法,两个按钮绑定的是一个方法,绑定的时候添加一个 : 意思就是把这个按钮传递过去,方便我们以后做区分,然后根据tag值来判断是哪一个按钮,根据按钮做不同的操作,这里还添加了一个简单的翻页动画:
#pragma mark 点击方法
- (void)btnClick:(UIButton *)sentBtn{

    if (sentBtn.tag == 100) {
        //提示未完成功能
        UIAlertView *ts =[[UIAlertView alloc] init];
        ts.title = @"SORRY";
        ts.message = @"登陆更能尚未实现 请稍后 \n ^_^~~~";
        [ts addButtonWithTitle:@"返回"];
        [ts show];
    }

    if (sentBtn.tag == 200) {
        [view removeFromSuperview];

        //翻页动画
        [UIView beginAnimations:nil context:nil];
        [UIView setAnimationDuration:2.0];
        [UIView setAnimationTransition:UIViewAnimationTransitionCurlUp forView:self.view cache:YES];
        [UIView commitAnimations];

        //创建一个子视图
        view1 = [[UIView alloc] init];
        view1.frame = CGRectMake(0, 0, 320, 480);
        view1.backgroundColor = [UIColor grayColor];
        [self.view addSubview:view1];

        //背景
        UIImageView *imageView = [[UIImageView alloc] initWithFrame:CGRectMake(0, 0, 320, 480)];
        imageView.image = [UIImage imageNamed:@"1.jpg"];
        imageView.userInteractionEnabled = YES;
        [view1 addSubview:imageView];

        //标签
        UILabel *label1 = [[UILabel alloc] init];
        label1.frame = CGRectMake(30, 100, 100, 50);
        label1.text = @"用 户 名 :";
        label1.font = [UIFont systemFontOfSize:20];
        [imageView addSubview:label1];

        UILabel *label2 = [[UILabel alloc] init];
        label2.frame = CGRectMake(30, 150, 100, 50);
        label2.text = @"密      码 :";
        label2.font = [UIFont systemFontOfSize:20];
        [imageView addSubview:label2];

        UILabel *label3 = [[UILabel alloc] init];
        label3.frame = CGRectMake(30, 200, 100, 50);
        label3.text = @"再次密码:";
        label3.font = [UIFont systemFontOfSize:20];
        [imageView addSubview:label3];

        //输入框
        tf1 = [[UITextField alloc] init];
        tf1.frame = CGRectMake(150, 109, 150, 40);
        tf1.placeholder = @"请输入用户名!";
        //        tf1.secureTextEntry = YES;
        tf1.borderStyle = UITextBorderStyleRoundedRect;
        tf1.clearButtonMode = UITextFieldViewModeUnlessEditing;
        [view1 addSubview:tf1];

        tf2 = [[UITextField alloc] init];
        tf2.frame = CGRectMake(150, 159, 150, 40);
        tf2.placeholder = @"请输入密码!";
        tf2.secureTextEntry = YES;
        tf2.borderStyle = UITextBorderStyleRoundedRect;
        tf2.clearButtonMode = UITextFieldViewModeUnlessEditing;
        [imageView addSubview:tf2];

        tf3 = [[UITextField alloc] init];
        tf3.frame = CGRectMake(150, 209, 150, 40);
        tf3.placeholder = @"请再次输入密码!";
        tf3.secureTextEntry = YES;
        tf3.borderStyle = UITextBorderStyleRoundedRect;
        tf3.clearButtonMode = UITextFieldViewModeUnlessEditing;
        [imageView addSubview:tf3];

        //按钮
        UIButton *btn = [[UIButton alloc] init];
        btn.frame = CGRectMake(50, 310, 100, 50);
        //    btn2.backgroundColor = [UIColor greenColor];
        [btn setTitle:@"提交" forState:UIControlStateNormal];
        [btn setTitleColor:[UIColor greenColor] forState:UIControlStateNormal];
        btn.tag = 300;
        btn.titleLabel.font = [UIFont systemFontOfSize:20];
        [btn addTarget:self action:@selector(btnClick1:) forControlEvents:UIControlEventTouchUpInside];
        //    设置背景图片
        UIImage *image = [UIImage imageNamed:@"3"];
        [btn setBackgroundImage:image forState:UIControlStateNormal];
        [imageView addSubview:btn];

        UIButton *btn1 = [[UIButton alloc] init];
        btn1.frame = CGRectMake(170, 310, 100, 50);
        //    btn2.backgroundColor = [UIColor greenColor];
        [btn1 setTitle:@"返回" forState:UIControlStateNormal];
        [btn1 setTitleColor:[UIColor greenColor] forState:UIControlStateNormal];
        btn1.tag = 400;
        btn1.titleLabel.font = [UIFont systemFontOfSize:20];
        [btn1 addTarget:self action:@selector(btnClick1:) forControlEvents:UIControlEventTouchUpInside];
        //    设置背景图片
        //        UIImage *image = [UIImage imageNamed:@"3"];
        [btn1 setBackgroundImage:image forState:UIControlStateNormal];
        [imageView addSubview:btn1];

    }
}
下面是注册页面的按钮点击事件,这里做了一些验证判断,还有返回登陆页面的翻页动画:
- (void)btnClick1:(UIButton *)sendBtn{

    if (sendBtn.tag == 300) {

        UIAlertView *ts =[[UIAlertView alloc] init];
        //    NSLog(@"tf1=======>>>>>> %@",tf1.text);
        //    NSLog(@"tf2=======>>>>>> %@",tf2.text);
        //    NSLog(@"tf3=======>>>>>> %@",tf3.text);

        //    NSLog(@"%d",tf2.text.length);
        if ([tf1.text stringByTrimmingCharactersInSet:[NSCharacterSet whitespaceCharacterSet]].length == 0 ) {
            ts.message = @"用户名不能为空!";
            [ts addButtonWithTitle:@"返回"];
            [ts show];
        }else{
            if (tf2.text.length < 6) {
                //        UIAlertView *ts =[[UIAlertView alloc] init];
                ts.message = @"密码不能少于六位!";
                [ts addButtonWithTitle:@"返回"];
                [ts show];
            }else{
                if ([tf2.text isEqual: tf3.text]) {
                    ts.message = @"注册成功!";
                    [ts addButtonWithTitle:@"确定"];
                    [ts show];
                    [view1 removeFromSuperview];

                    //翻页动画
                    [UIView beginAnimations:nil context:nil];
                    [UIView setAnimationDuration:2.0];
                    [UIView setAnimationTransition:UIViewAnimationTransitionCurlUp forView:self.view cache:YES];
                    [UIView commitAnimations];
                    //                 [self.window addSubview:view];
                }else{
                    //       UIAlertView *ts =[[UIAlertView alloc] init];
                    //        UIAlertView *ts =[[UIAlertView alloc] init];
                    ts.message = @"两次输入密码不一致!";
                    [ts addButtonWithTitle:@"返回"];
                    [ts show];
                }
            }
        }

    }
    if (sendBtn.tag == 400) {

        [view1 removeFromSuperview];
        //翻页动画
        [UIView beginAnimations:nil context:nil];
        [UIView setAnimationDuration:2.0];
        [UIView setAnimationTransition:UIViewAnimationTransitionCurlUp forView:self.view cache:YES];
        [UIView commitAnimations];
        [self.view addSubview:view];
    }
}
我们的登录界面就写好了~
在这里我再介绍一个小技能,就是点击输入框的时候系统会弹出一个键盘,但是填完之后觉得它碍事,一般我们的处理就是点击输入框以外的页面就让键盘下落,我这里介绍一个常用的方法:
- (void)touchesBegan:(NSSet *)touches withEvent:(UIEvent *)event{
    //    让键盘下去,可以借助touch事件触发的touchesBegan方法
    //    结束文本框的编辑状态endEditing,键盘就会自动下去
    //    让window上的所有文本框结束编辑状态
    [self.view endEditing:YES];
}