iOS中现在的设计风格几乎都是下面一个TabBar,上面一个NavigationBar,RN中也做了相应的控件,先来说说TabBar。
一、TabBarIOS常见的属性
View的所有属性都可以被继承
barTintColor color 设置tab条的背景颜色
tintColor color 设置tab条上被选中图标的颜色
translucent bool 设置Tab栏是不是半透明的效果
二、TabBarIOS.Item常见的属性
badge number
在图标的右上方显示小红色气泡,显示信息
icon Image.propTypes.source
Tab按钮自定义的图标,如果systemicon属性被定义了,那么该属性会被忽略
onPress function
当Tab按钮被选中的时候进行回调,你可以设置selected={true}来设置组件被选中
selected bool
该属性标志子页面是否可见,如果是一个空白的内容页面,那么一定是忘记了选中任何的一个页面标签Tab
selectedIcon Image.propTypes.source
设置当Tab按钮被选中的时候显示的自定义图标,如果systemIcon属性被设置了,那么该属性会被忽略。如果定义了icon属性,但是当前的selectedIcon属性没有设置,那么该图标会被设置成蓝色
style 设置样式风格,继承View的样式各种风格
systemIcon
enum('bookmarks','contacts','downloads','favorites','featured','history','more','most-recent','most-viewed','recents','search','top-rated')
系统预定义的图标,如果你使用这些图标,那么你上面设置的标题,选中的图标都会被这些系统图标所覆盖。
title string
在Tab按钮图标下面显示的标题信息,如果你设置了SystemIcon属性,那么该属性会被忽略
三、来个例子
import React, { Component } from 'react';
import {
AppRegistry,
StyleSheet,
Text,
View,
TabBarIOS
} from 'react-native';
var Dimensions = require('Dimensions');
var {width} = Dimensions.get('window');
var tabBarView = React.createClass({//类名一定要大写开头
//设置初始值
getInitialState() {
return{
//默认被选中的tabbar Item
selectedTabBarItem: 'home'
}
},
render() {
return (
{/*头部*/}
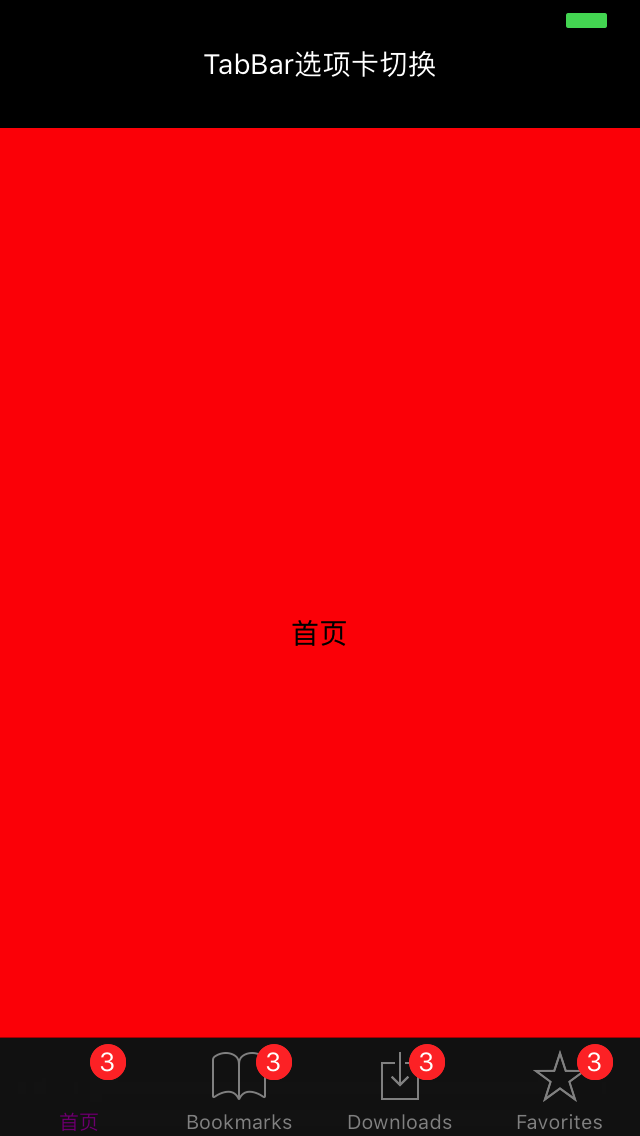
TabBar选项卡切换
{/*选项卡*/}
{/*第一块*/}
{this.setState({selectedTabBarItem: 'home'})}}
>
首页
{/*第二块*/}
{this.setState({selectedTabBarItem: 'two'})}}
>
第二页
{/*第三块*/}
{this.setState({selectedTabBarItem: 'thr'})}}
>
第三页
{/*第四块*/}
{this.setState({selectedTabBarItem: 'four'})}}
>
第四页
);
}
});
const styles = StyleSheet.create({
container: {
flex: 1,
backgroundColor: '#F5FCFF',
},
tabbarStyle: {
flex: 1,
width: width
},
commonViewStyle: {
flex: 1,
justifyContent: 'center',
alignItems: 'center',
},
headerViewStyle: {
height: 64,
backgroundColor: 'black',
justifyContent:'center',
alignItems: 'center'
}
});
//输出类
module.exports = tabBarView;
这样简单的例子就OK了,当然只是演示,实际操作还要变,来看一下效果